This blog moves to Forestry
What I learnt when moving this project to a CMS
Posted on:
Tags:
#static-site-generator
I am pleased to announce that I have moved this Jekyll blog to be managed using the Forestry.io CMS platform.
Overview
Their homepage:

App dashboard with a list of sites in your account.

Continue below for some screenshots when editing content in Forestry.
Functionality
Some things I discovered while exploring the service with this Jekyll site:
Limits
- See the Forestry pricing page.
- On the free tier you can:
- Manage up to 3 sites.
- Invite up to 3 users per site.
- Forestry is not aware of Jekyll Liquid paths or base path value, so creating paths and image paths may take extra work or not display well in the editor even though the built site is fine. Using a site without a base path (such as Netlify rather then GitHub Pages) makes this easier.
- Forestry has its own markdown preference.
- Bullet points are all asterisks.
- If you try and insert links which are linked later in the page, Forestry will bring the link up to where it is used. e.g.
[foo]and[foo]: http://example.combecomes[foo](http://example.com)only, which can be annoying if you want to use the link multiple times.
Configuration
Configuration is managed in a .forestry directory in GitHub. Including site settings and front matter templates. This means that
- Configuration is version-controlled, so you can view the history for rolling back changes.
- You can remove and import a site without having to set it up manually again.
- An existing config file can be used as a base when creating config files for other repos and this can even be done before they are imported into Forestry.
Editing the sidebar
- The default sidebar view is just for editing Pages and Posts, but you can manually add more files and directories under Settings / Sidebar.
- Such as the
_includesor_layoutsdirectories (you’ll need to change the configuration to pickup.htmlfiles rather than the default.md). Directories like won’t matter to non-technical users, but it means a developer can edit them without leaving Forestry. You can even make these “Read only”. - Example of sidebar setup, with Posts as the current tab.
- Add your _config.yml file to manage site config from in Forestry.

Editing content and using templates
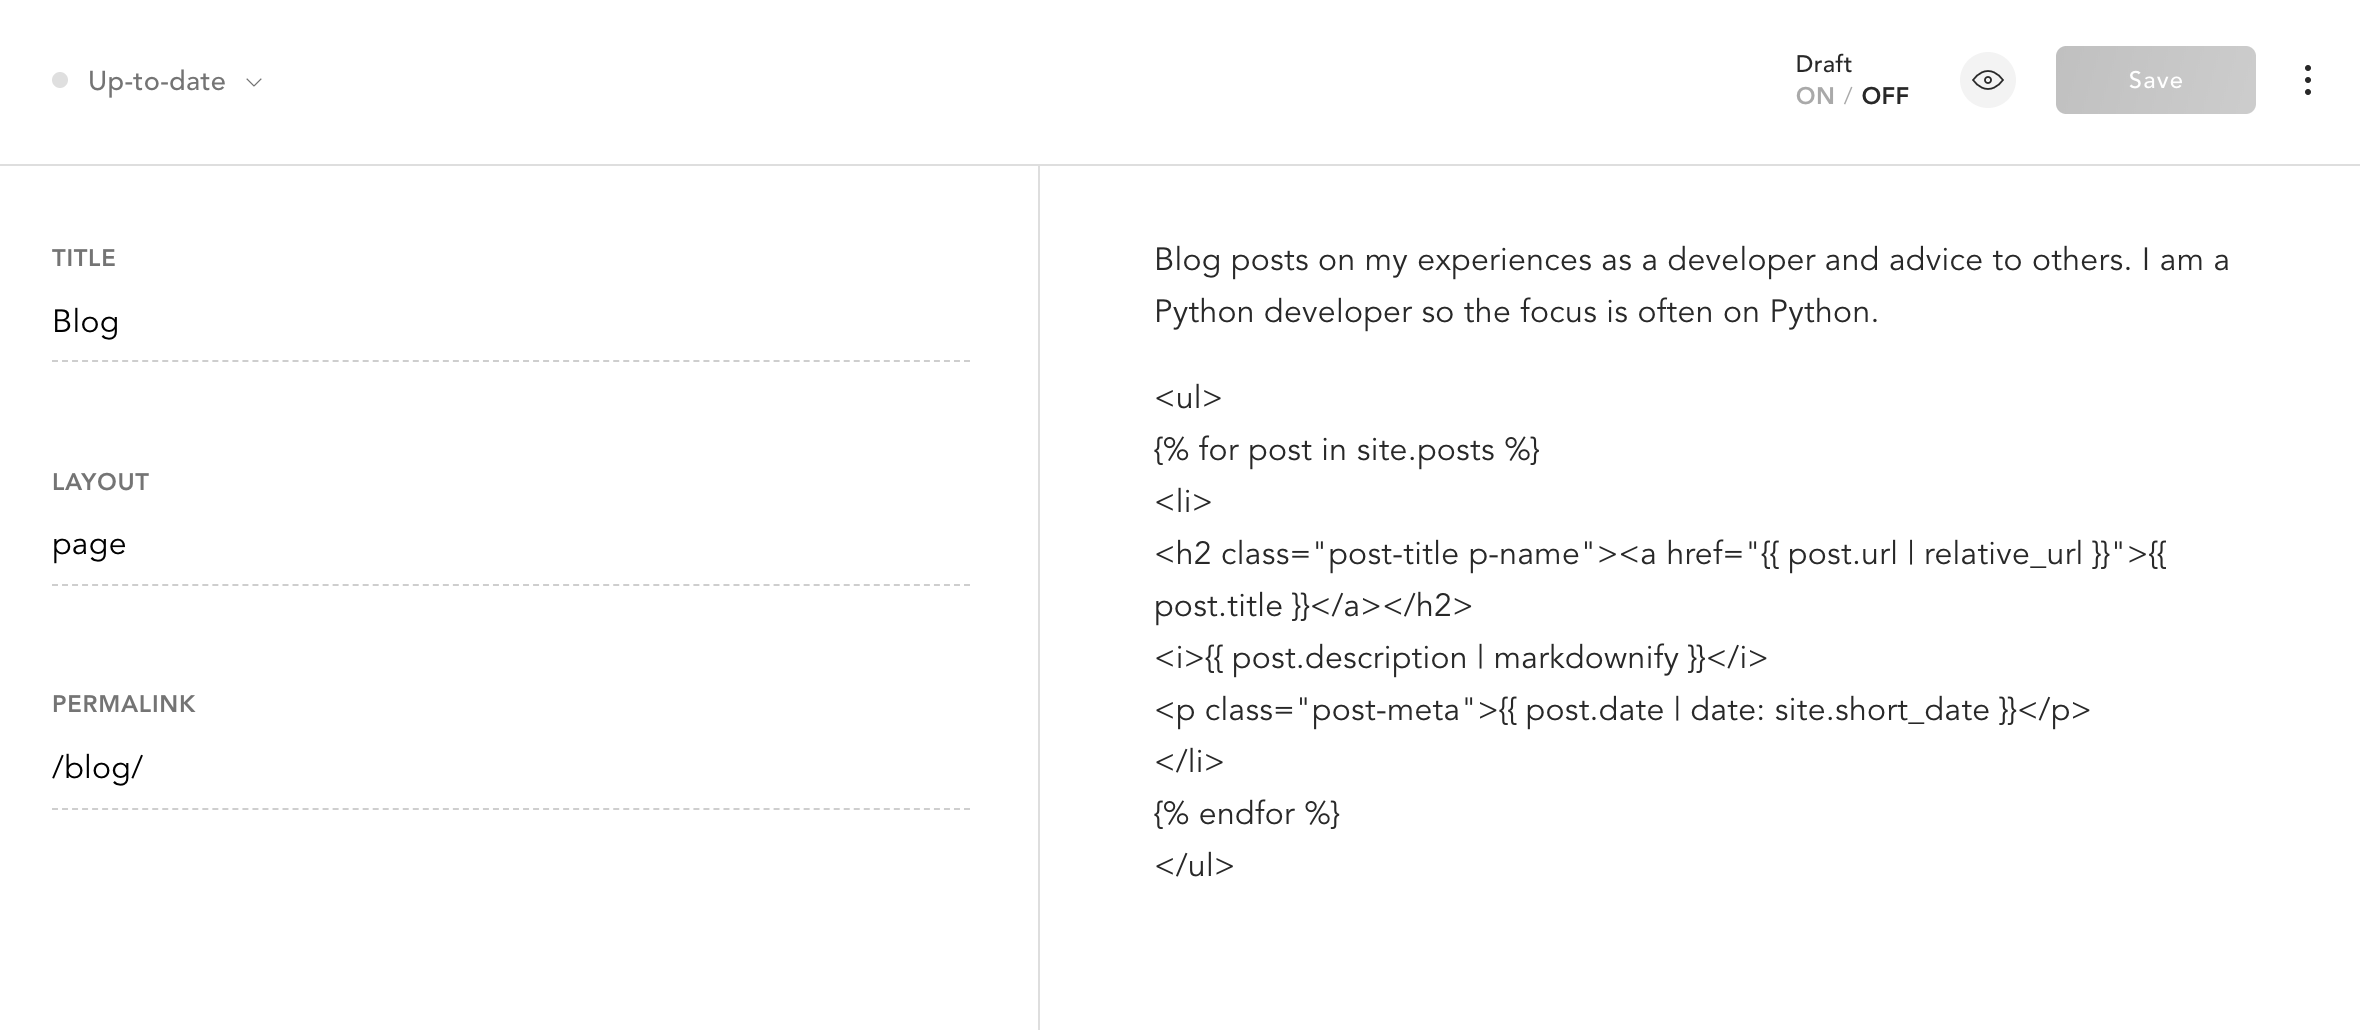
- View when editing an HTML file which has data (stored in metadata) shown on the left and content on the right (stored in body). Also, if you edit a file which is a .yml file such as the site config, Forestry will only show the data portion .
- On the Front matter section of the sidebar, you can create templates based on existing files. For example you might create a Blog post template and a Page template. When you create a new page or blog post, you can choose which template you want. A template is great for adding frontmatter fields like title or description and setting validation on the length of a field or whether it is required or not.
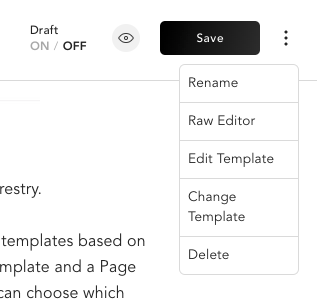
- When editing a page, you can use the WYSIWYG Editor by default using the menu at the bottom and keyboard shortcuts (such as for bold and italics). You can switch between the Raw Editor and WYSIWYG Editor using the menu in the top right. I find there is way to reduce indentation for bullet points, but this is easy in raw mode.
- You can even change the template, you need different fields and validation.
- Example of options when editing a page:
- You don’t have to worry about managing filenames of pages or blog posts - these are based on the title you use. And the date, in case of blog posts, which need a date.
- You can leave pages and posts in draft form and then come back to them later. Change Draft from ON to OFF, then the Save Draft button becomes Save.
Media
- You can manage assets such as images through Forestry. By default these go to the uploads directory, but for Jekyll you might use the assets directory. If you click Media in the sidebar, you can see files in that directory.
- You can preview images in the CMS editor when laying them out. But if you use a GitHub Pages Jekyll site on a subpath, then the images will give errors on the finished site when published. So then you have to use the
relative_urlJekyll filter, which only shows as text in the editor but looks fine in the rendered site. If you use Netlify (on a subdomain rather than a subpath) then you won’t have this issue.
Saving and rebuilding
- The default is to save a page as a draft.
- Forestry will auto-save content for you and if you return to a file it will ask you if you want to discard changes or use the work in progress unsaved changes.
- When adding a site to Forestry, it by default only it only looks at public repos. You can add access as well for private repos, but you might avoid this if you have permissions for a work-related org of private repos.
- When you add a GitHub repo to Forestry, you get to choose the branch. When you’ve confirmed, you’ll get an email from GitHub saying that a public key was added to the repo. This means you have authorized Forestry to edit that repo.
- A commit is made whenever you click save in Forestry. These appear in GitHub as authored by your user and a Forestry user.
- If your site is slow to rebuild, you can use the preview mode in Settings as that only rebuilds the contents that changed. This can be useful if you have a large site that take a minute to rebuild normally and simulates using
--incrementalflag for Jekyll locally.